TRAINING
It's important that you get this right.
Let us show you the way.
OVERVIEW
Stock lengths are the extruded components for the glazing systems and are typically provided in 24’ pieces from the manufacturer.
Stock length take-offs and material ordering is a critical skill each project manager must possess to run a successful glazing project. Glazing contractors utilize many different methods for quantifying the required stock lengths for any given project. Even within the same company, jobs of different sizes and complexities will require different methods of take-off.
The ultimate goal is to be able to use your shop drawings and create an order list of stock length materials required to fabricate and install the project. Whichever method of take-off you use, efficiency must be a priority. Ordering too little or too much could be a costly mistake.
Depending on the manufacturer, finish and system types, lead times will vary to receive the parts. This could take 4-6 weeks, or even longer. Ordering enough material is critical to avoid delays during fabrication.
If you want to learn more about ordering stock lengths for the glazing industry, head over to GIT, Glazing & Industrial Technologies.
DICE, CUT LIST OPTIMIZER
The method we will be focusing on will show you how to utilize a cut list optimizer program where we input the individual parts and pieces required for each extrusion type.
Once the information is entered into DICE, the program tells us the optimized amount of material to order for each type of stock length required.
CUT LIST OPTIMIZER, QUICK START
DICE Training Manual
A simple overview of DICE, in 4 steps!
STEP 1: Start a New Project
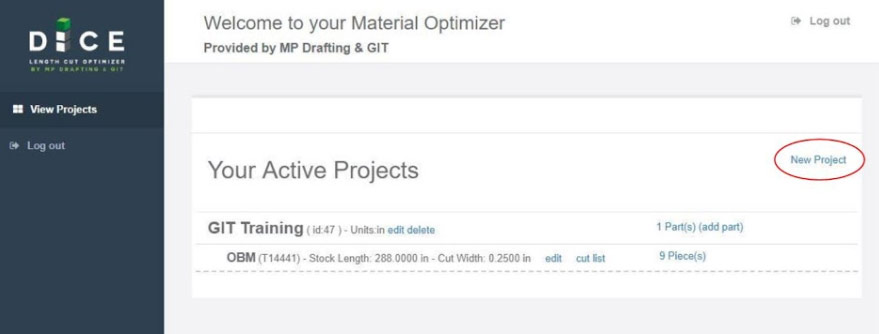
- Click “New Project” on the right side of your screen
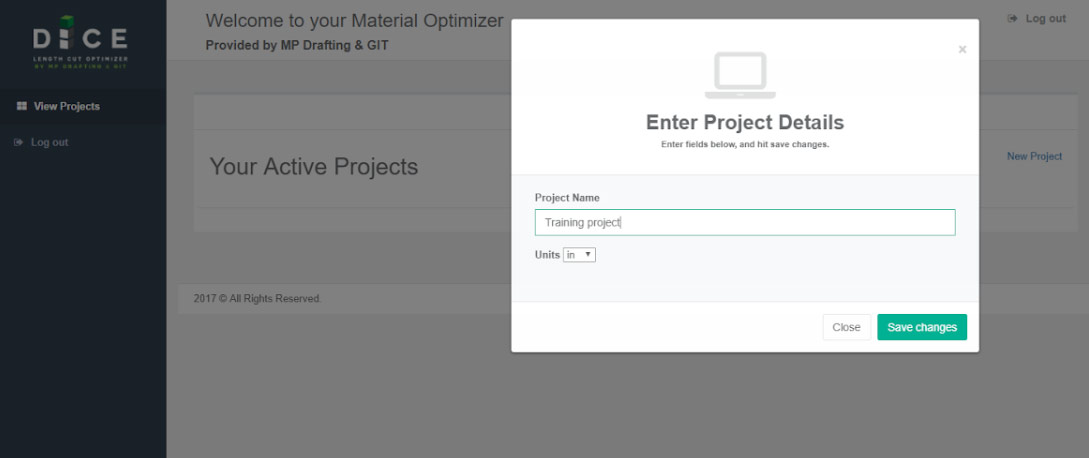
- Fill out your “Project Name”
- Select inches or cm for “units”
- Click “Save Changes”
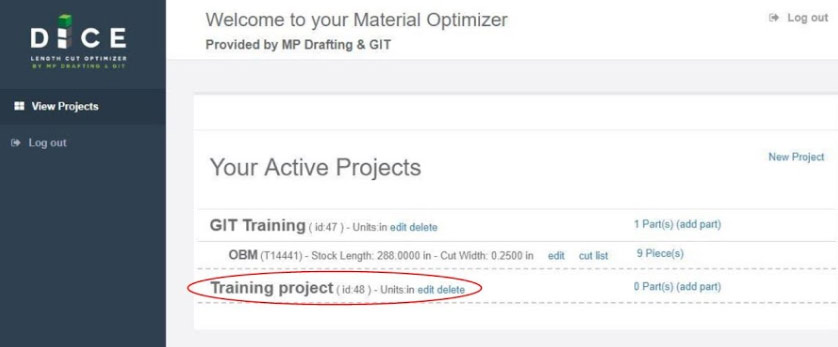
- Your new project will appear under “Your Active Projects”, on your dashboard
STEP 2: Add Your First Part
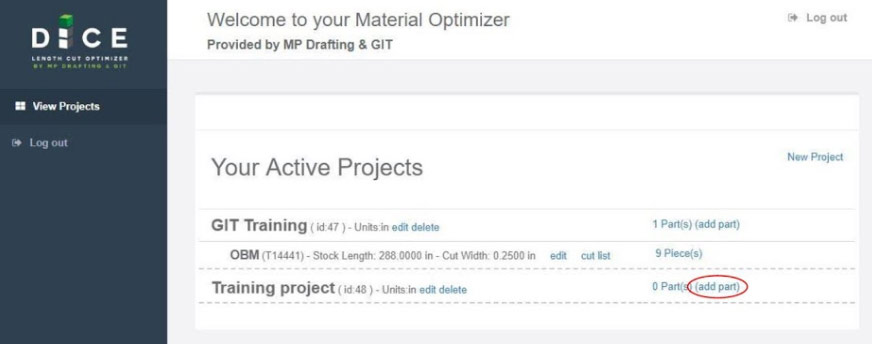
- Click “(add part)” on the right side of your screen
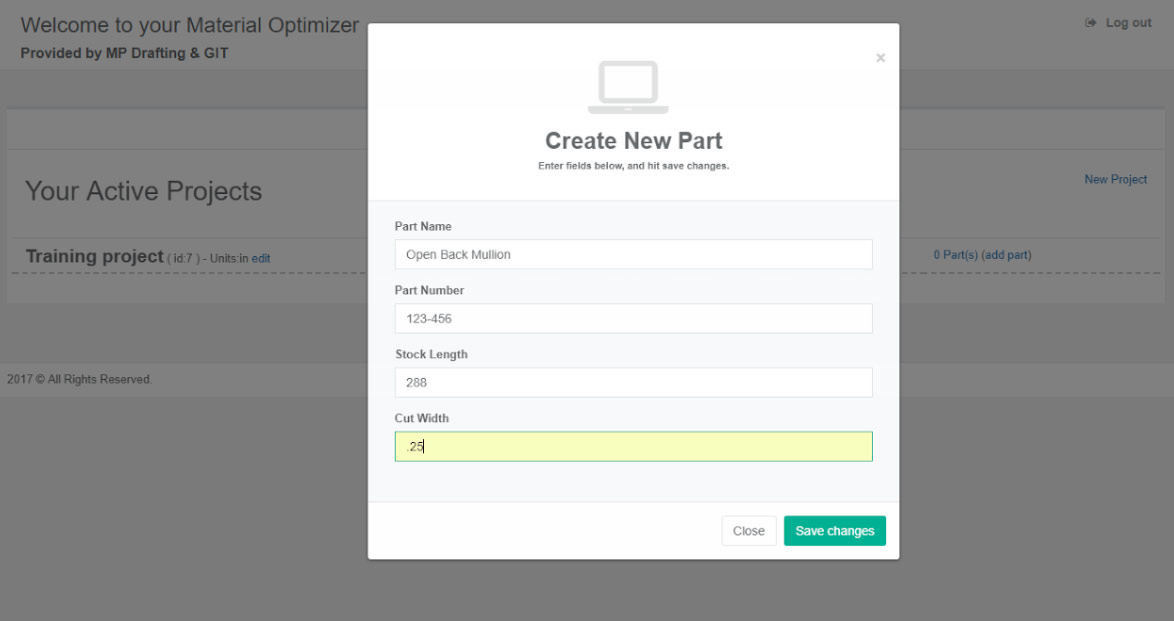
- Fill out part name, in this case: Open Back Mullion
- Fill out part number, in this case: 123-456
- Input your useable length of material, in this case it is 288 (only enter numbers, we set the units as inches already)
- Input your cut width (blade thickness), in this case it is .25 (you can enter fractions or decimals)
- Click “Save Changes”
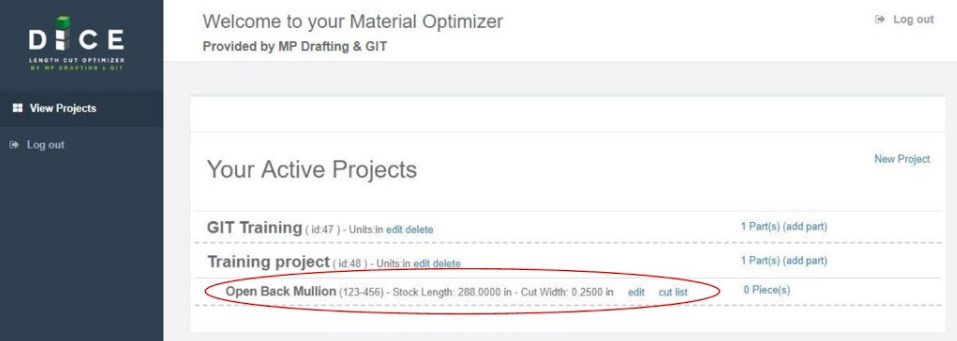
- The part you just entered now appears under your project name
- You can add any additional parts required at this time
STEP 3: Add Quantities for Each Part
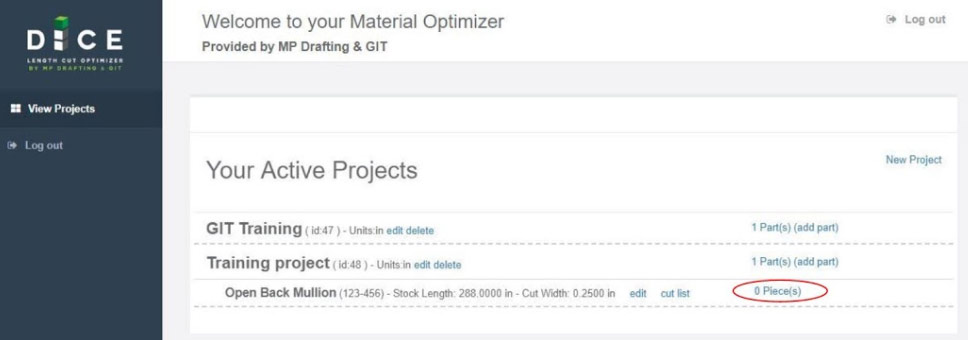
- Click “0 Piece(s)” on the right

- You will notice a line item appears under your part name, along with a few column headings: “Phase”, “Quantity”, “Length” and “Note”
- Click “(add piece)”

- Another line item has appeared displaying “Piece Name” again and “0” under each column heading
- These fields are editable if you click into them

- The image above shows an example with 4 pieces added to the Open Back Mullion part
- Each piece will have an individual name (or tag), enter them into the first column as shown: “Piece 1”, “Piece 2”, etc.
- If your project is to be cut in phases then you have the option to note that under the phase column. If everything is to be cut at one time then input “1” for each
- Add the quantity for each piece
- Add the cut length for each piece (this can be done in decimals or fractions)
- If you have a note, for the fabricator, for any particular pieces add them under the note column as shown above
- If you want to delete a row entirely, you can click on the red “X” at the right side of the row under the “Action” column
- When adding additional pieces you will continue to click “(add piece)”
STEP 4: Run Cut List Program

- Once you have entered in all the pieces for your part you can run the cut list program by clicking “cut list”
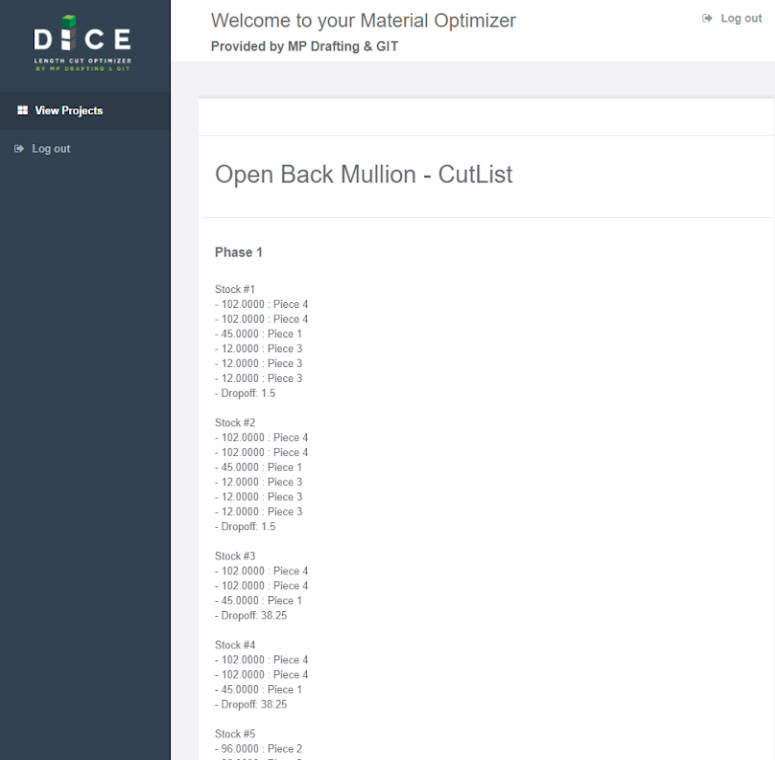
- The list above will appear displaying the quantity you need for that part and what individual pieces to cut from each
- You can also see how much of a drop off you will have for each part
- You can right click on the screen and select “print” to print this report as well
- Your projects will auto save


